Route Transfer Basics
When transferring data between different systems, the systems need to speak the same language, in order to get it right. That's why there are different standardized route formats. The most common one is GPX, but there are many others including ITN and KML. In many ways these formats work with the same mechanics, so understanding the basics will help a lot to understand the greater picture.
Usually there are up to three ways to represent route data:
- The
Trackis an exact copy of the planned route. From a technical perspective, there will be a point every few meters, these points are connected by a line, the Track does not contain any waypoints. - The
Routeand theWaypointsboth contain the waypoints of the planned route and optionally additional waypoints to support the route. Usually theRouteis used to characterize a succession of points which form a route.Waypointsare often used to visualize points on a map that might not need to be visited in order (for example POIs).
So should you use the Track, the Route, or maybe both? Unfortunately, there is no right answer. It depends on your navigation device / app and on your preferences. The Track is an exact copy of the planned route, but it's relatively unflexible, you can't just change a part of the planned route. The Route is relatively flexible, you can delete a waypoint or change a part of the route, but it might be different to the originally planned route.
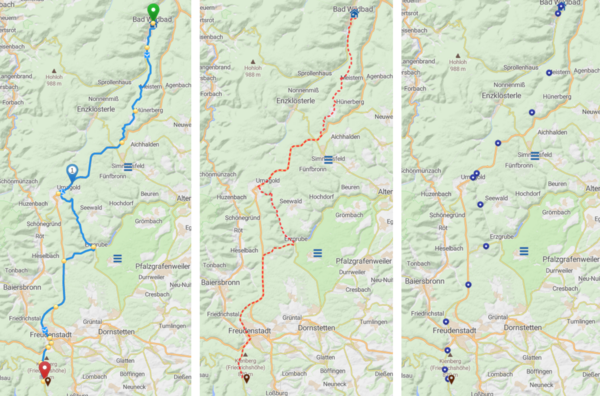
Left: Originally planned route
Middle: Track
Right: Waypoints / Route
Here you can clearly see, when you choose the Waypoints / Route, that the navi can choose the route between the points. In this example, there aren't many places where it could go wrong, but we also placed quite a lot of additional points.
The best results are achieved with the Kurviger App. For iOS devices it's recommended to use the Scenic App.
Details see Route Transfer (Import, Export)
